Tuesday, February 28, 2017

How to change DNS in Windows 10

1. Right click the Start menu and select Network Connections.

Screen_Shot_2015-08-04_at_1.35.34_PM.png


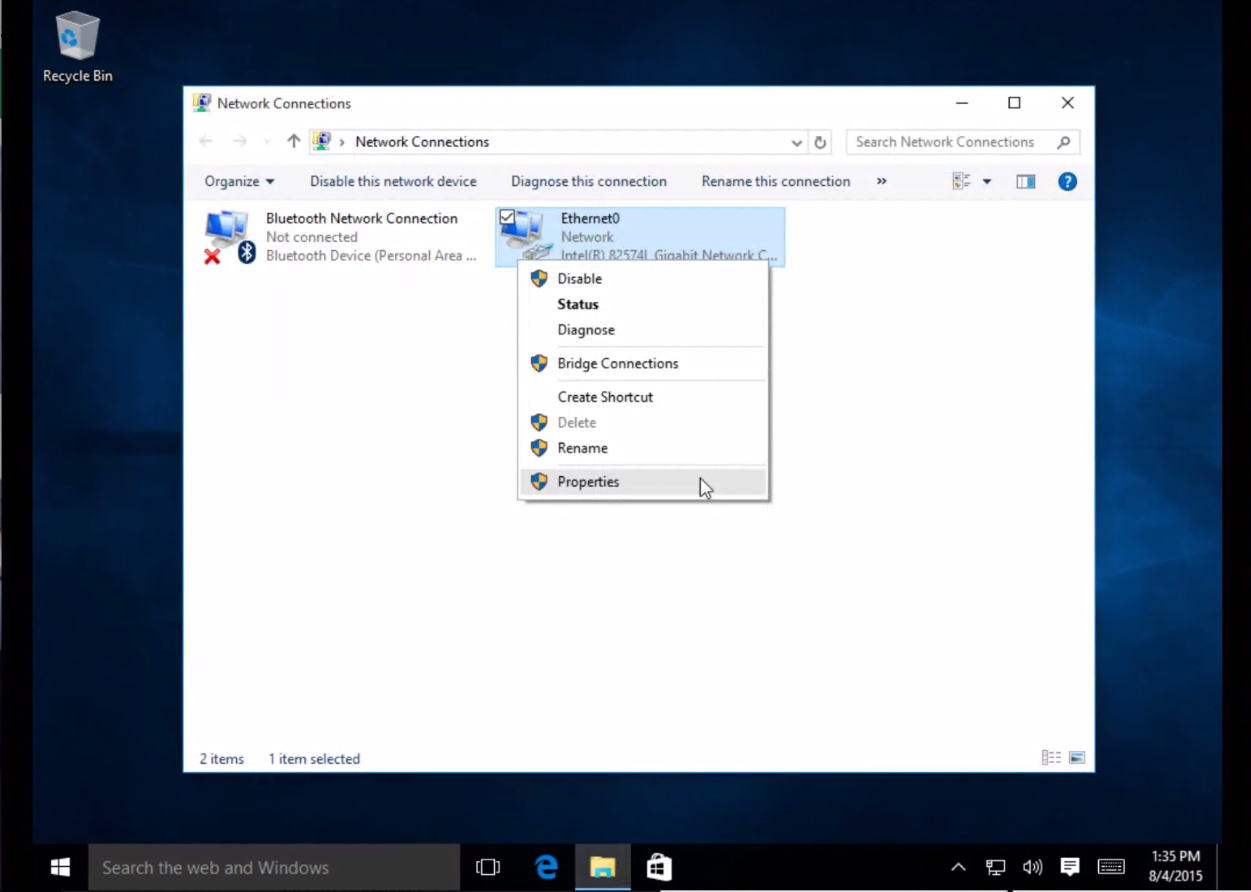
2. Right click the network connection you're using and select Properties.

Screen_Shot_2015-08-04_at_1.35.46_PM.png


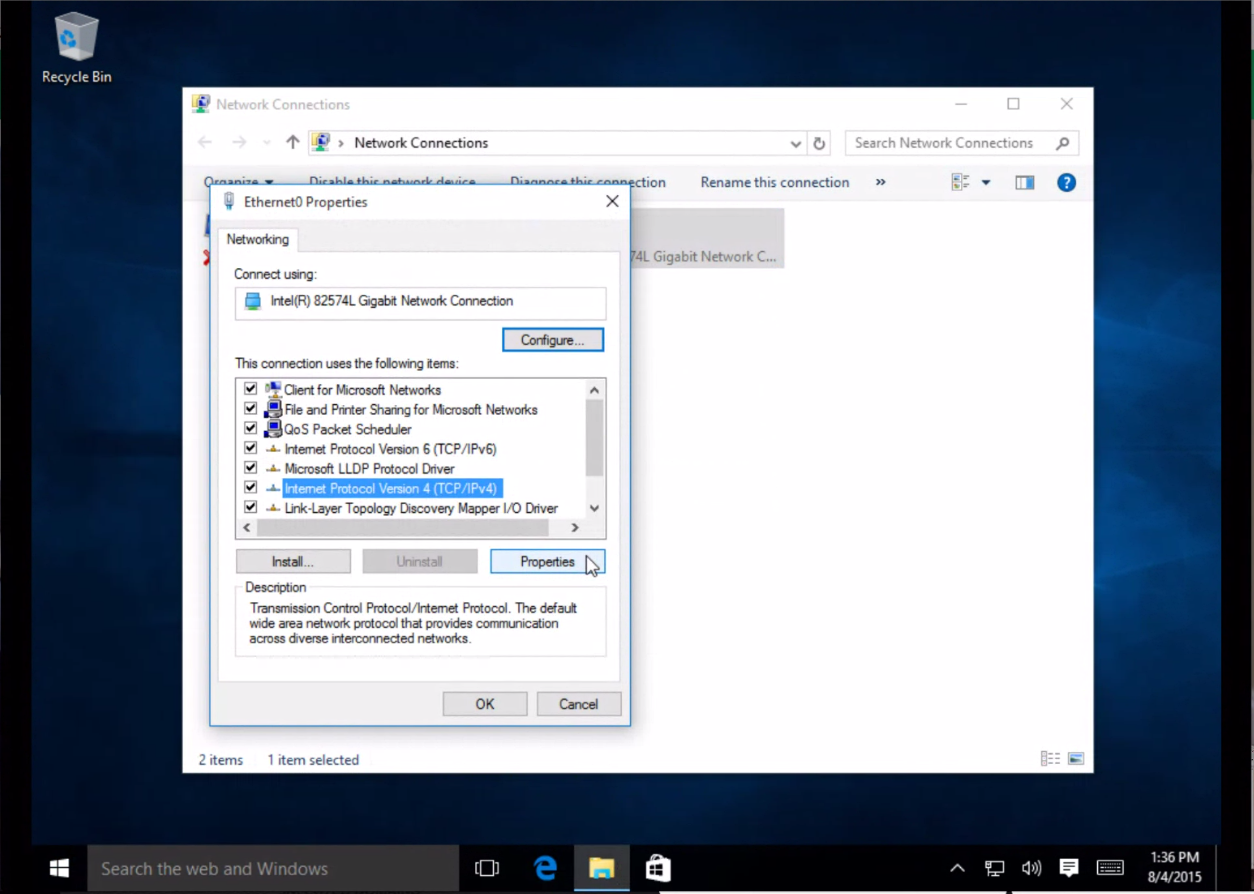
3. Highlight 'Internet Protocol Version 4 (TCP/IPv4)' and click Properties.

Screen_Shot_2015-08-04_at_1.36.02_PM.png


4. Select Use the following DNS server addresses and type OpenDNS' addresses (208.67.222.222 and 208.67.220.220) in the Preferred DNS server and Alternate DNS server fields.
Screen_Shot_2015-08-04_at_1.34.27_PM.png

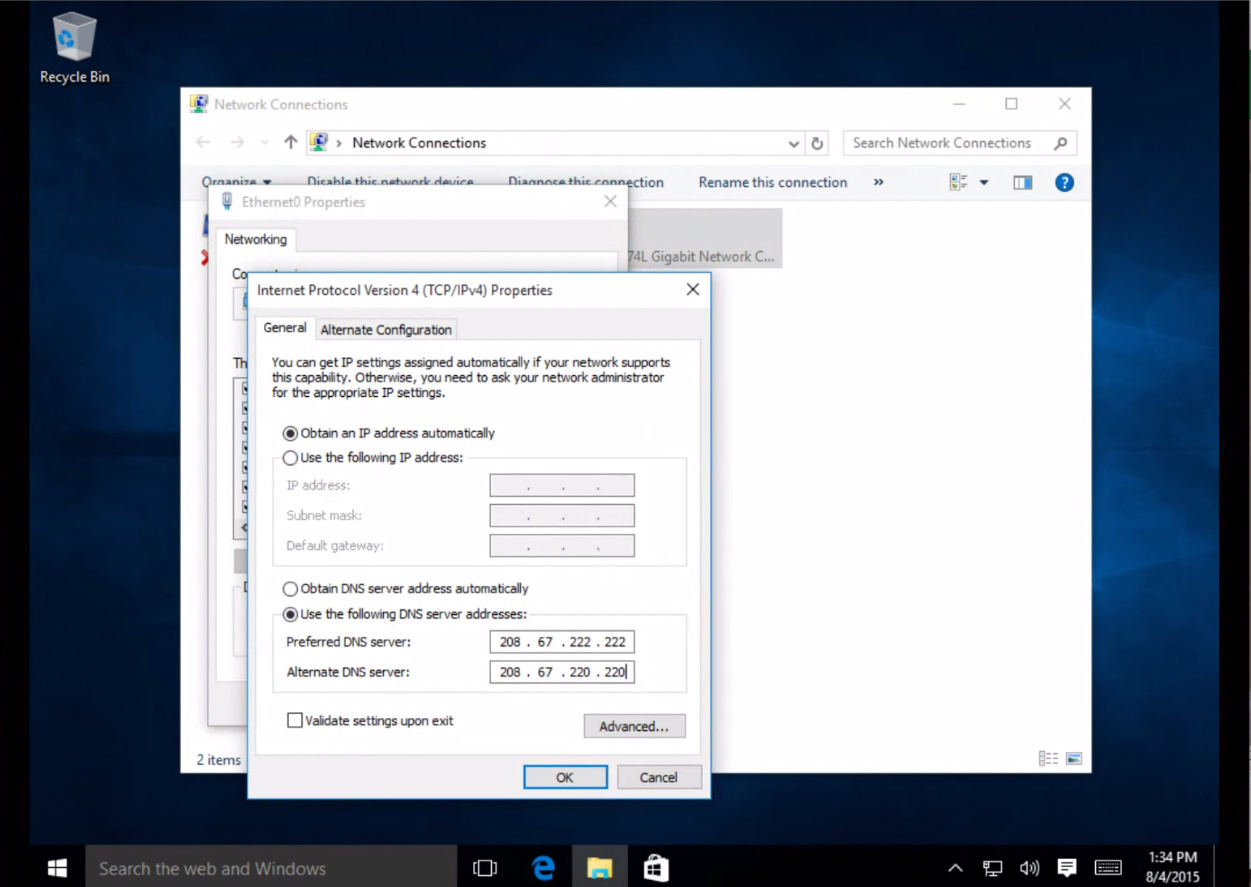
5. Click OK, then Close, then Close again. Finally, close the Network Connections window.

Post Source

Free & Public DNS Servers (Valid February 2017)


ProviderPrimary DNS ServerSecondary DNS Server
Level31209.244.0.3209.244.0.4
Verisign264.6.64.664.6.65.6
Google38.8.8.88.8.4.4
DNS.WATCH484.200.69.8084.200.70.40
Comodo Secure DNS8.26.56.268.20.247.20
OpenDNS Home5208.67.222.222208.67.220.220
DNS Advantage156.154.70.1156.154.71.1
Norton ConnectSafe6199.85.126.10199.85.127.10
GreenTeamDNS781.218.119.11209.88.198.133
SafeDNS8195.46.39.39195.46.39.40
OpenNIC996.90.175.167193.183.98.154
SmartViper208.76.50.50208.76.51.51
Dyn216.146.35.35216.146.36.36
FreeDNS1037.235.1.17437.235.1.177
Alternate DNS11198.101.242.7223.253.163.53
Yandex.DNS1277.88.8.877.88.8.1
UncensoredDNS1391.239.100.10089.233.43.71
Hurricane Electric1474.82.42.42
puntCAT15109.69.8.51